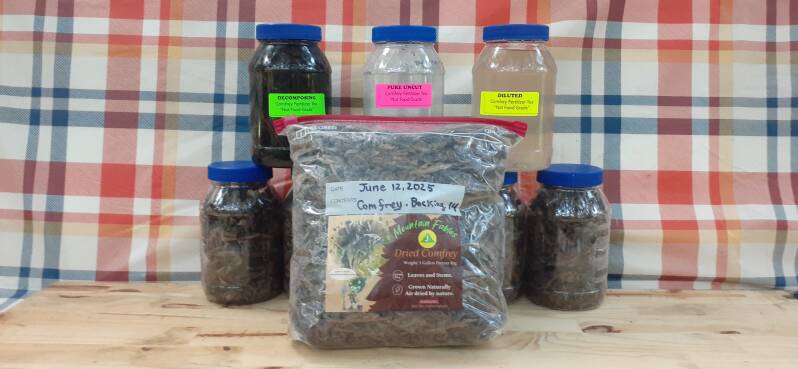
AKA: Comfrey Plant Food ~ Comfrey Body Soak ~ Comfrey Infused Water
Below you will find the Detailed with Hints Versions of how to make the "Tea"
- The Detailed with Hints Version provides more thorough explanations, complete with helpful tips and insights.
- The Quick Version gives a concise, straight to the point set of instructions. No frills. No extras.
- Both instructions will produce the desired result... Comfrey Fertilizer Tea.
- Plant Food or Body Soak. (See Introduction for more information on uses.)
Three Simple Steps = DSD
- (D) = Decompose: This step brakes down the plant matter and releases the chemical properties within the plant structure.
- (S) = Strain: This step separates the liquid from the broken down plant matter creating a "Pure Uncut" liquid.
- (D) = Dilute: This step adds water to weaken the strength of the Pure Uncut fertilizer.
- Easy to remember as - DSD These three simple steps are the same whether you are using Dried Comfrey or Fresh Comfrey!

Choose the amount of Comfrey you want to use
- You do not have to use the Comfrey all at once. Each one (1) Gallon Freezer Bag of dry Comfrey will fill (5) 30 oz. plastic Mayo jars.
- One dry US gallon is equal to 148.94545 ounces. Reference: Dry Gallon to Ounce Conversion Chart.
- As long as the Dried Comfrey remains dry and is stored in an airtight container it has a long shelf life. I do not have an exact expiration date to offer, but it last a long time. Although I have access to fresh Comfrey I still store Dried Comfrey for winter use and also as a convenient "grab" during busy times. I have used Comfrey more than several seasons old and seen no difference in its effectiveness. The key is - keep it in an air tight container and store in a moisture free area.
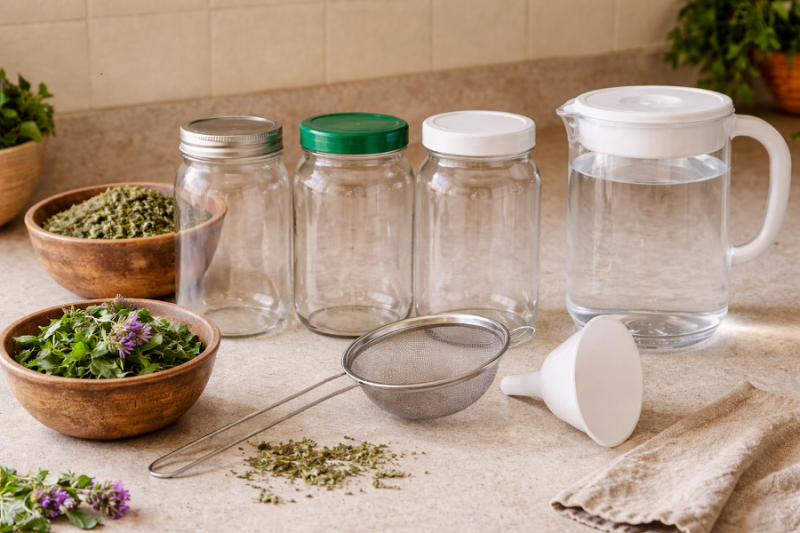
Needed:
- Dried or Fresh Comfrey 4. Strainer
- 3 jars with tight fitting lids 5. Funnel
- Water


Step 1: Decompose
There are two decomposition methods
- Choose the decomposition method you wish to use.
- Follow the directions.
- Then proceed to Step 2.
COLD WATER STEEPING
HOT WATER BREWING

THE COLD WATER STEEPING METHOD
The Cold Water Method of decomposition is simpler and less time consuming, however the decomposition time is slower, meaning the fertilizer will take longer before it is ready to use.
To use this method:
- Choose a plastic container with a lid.
- Plastic rather than glass is suggested so that if the container is dropped the fertilizer will not be lost.
- Fill the container about 3/4 from the top with the Dry Comfrey.
- Add cold water or tap hot water to the top of the jar.
- Use a utensil to submerge the Comfrey.
- Cap securely.
- Apply the identification labels that have been provided.
- Place on a convenient shelf at room temperature. Rotate occasionally, if desired.
- Let soak for (2) to (6) weeks. (Or longer if desired when using for plant food) (For immediate use (1) day to (1) week.)
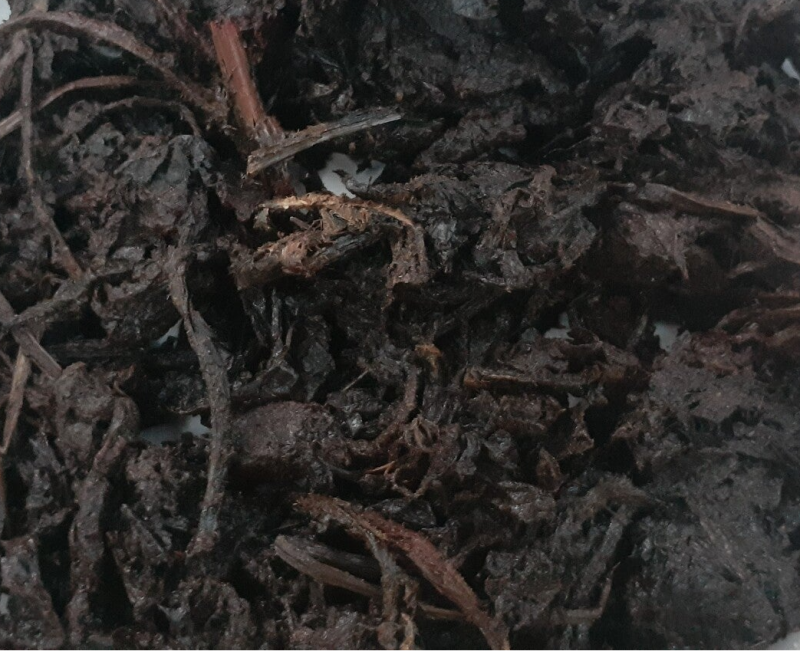
- When water color changes and there is the hint of a decaying smell, the fertilizer is ready.
- The longer it soaks the more potent it will become. (Smell and color will differ per batch.)
- Proceed to STEP 2: Strain

THE HOT WATER BREWING METHOD
The Hot Water Method of decomposition takes just a bit more time but produces a ready to use fertilizer quicker.
To use this method:
-
Bring a pot of water to a low boil,
-
Fill a pot, glass bowl or glass jar with the desired amount of dried Comfrey you want to process. You will be transferring to a plastic container when it cools. A plastic container with a screw on top is suggested so that if it ever tips over or drops it will not spill or brake and you will not loose your fertilizer. Use glass first so you do not warp your plastic container. If you have a plastic container; with a tight fitting lid, that won't warp with the heat, you will be able to skip the transferring Step #8.
-
Add enough boiling water to cover the Comfrey. Use a spoon or other utensil to make sure all of the Comfrey is submerged. Cover lightly, allow some airflow as it cools.
-
The hot water accelerates hydration and brewing of the Comfrey, speeding up the decomposition process.
-
As in nature, the decaying process releases the Comfrey's much sought after minerals, vitamins and nutrients.
-
Let the mixture stand until it reaches room temperature.
-
Stir occasionally, making sure all the Comfrey gets soaked.
-
When cool transfer to the plastic container. Cap the container.
- Apply the identification labels that have been provided.
- Place aside to .
- Rotate the jar occasionally, if desired
- Let stand / "steep" for (2) to (6) weeks. The longer the stronger. (Or longer if desired when using for plant food) (For immediate use (1) hour to (1) day.)
- The longer it steeps the stronger the concentrate and more detectable a rotting odor.
- Smell and color will differ per batch.
- Proceed to STEP 2: Strain
STEP 2: Strain
The next step is to separate the infused liquid from the plant matter.
- When you are satisfied with your fertilizer's strength, you will have in your possession, a concentrated concoction known as COMFREY FERTILIZER TEA! But you are not done!!!
-
At this step it is time to separate the plant matter from the liquid.
-
Using a strainer, cheese cloth, or old piece of cotton clothing, strain the liquid into another jar with a lid for storage.
-
Apply the identification labels that have been provided.
-
The decomposed plant matter that remains may be brewed again and again. Repeat Step 1.
-
With each brewing the liquid will get lighter and lighter, as with any tea. When the liquid runs clear; or has lighten in color, the nutrients have all, or mostly all, been extracted and you can stop using it to steep.
-
BUT! Don't discard the plant matter that is left. Soil loves plant matter. It can be mixed in with soil to enrich the soil and surrounding plants. Do not put on plant roots directly
-
If adding to house plant soil, chop finely and use sparingly.
-
The plant matter can also be broadcast around an area to be incorporated into the soil by rain.
-
Another option is to re-dry it by spreading it out on a plate in a warm area. Once dry it can be stored to mix in with soil at a later date.
-
Proceed to STEP 3: Dilute.


7. Use the end plant matter in soil.


STEP 3: Dilute
-
The concentrate is very potent. It must be diluted with water before use.
-
Applying it undiluted to your plants may cause damage.
-
Applying it to skin undiluted may cause irritation or rash.
-
Dilute all at once or dilute as needed.

- The longer the concentrate has brewed, the stronger it will be, so... the more it needs to be diluted.
-
With each brew of the same batch the tea becomes weaker and does not need as much water added.
-
Some people go by the color. The darker the liquid is the stronger the concentrate. The lighter the liquid the less cutting necessary.
-
There are several Schools of Diluting which vary on how much water to cut the concentrate with. One school suggest a (1) cup of Comfrey Infused Water to (5) cups water, expressed as a 1:5 ratio Another suggests a 1: 10 ratio. Yet another is a 1:20 ratio. And there are probably a range of ratios which fall in between all of those, showing that dilution is not an exact science. With that said, start weak until you learn each plants needs.
-
Choose your dilution ratio.
-
Next add your chosen ratio of concentrate to the third jar. Add your chosen ratio of water to this jar. The liquid should be light in color once combined, like a tea bag that has been used several times.
- Cap securely
-
Apply the identification labels that have been provided.
- Store in an area that is cool or room temperature .

The most important things to remember are:
- Humans - Some Animals} Do not consume.
- Humans - Animals} Do not use on broken skin.
- Plants - Humans - Animals} Don't use undiluted.
- Plants - Humans - Animals} Patch test before use.
- Plants - Humans - Animals} Don't over use.
- Plants} Don't pour directly on the plant or roots.
- Plants} Pour in a perimeter around the plant.
- Plants} If used as a spay on foliage the water ratio should be higher than when adding to soil.